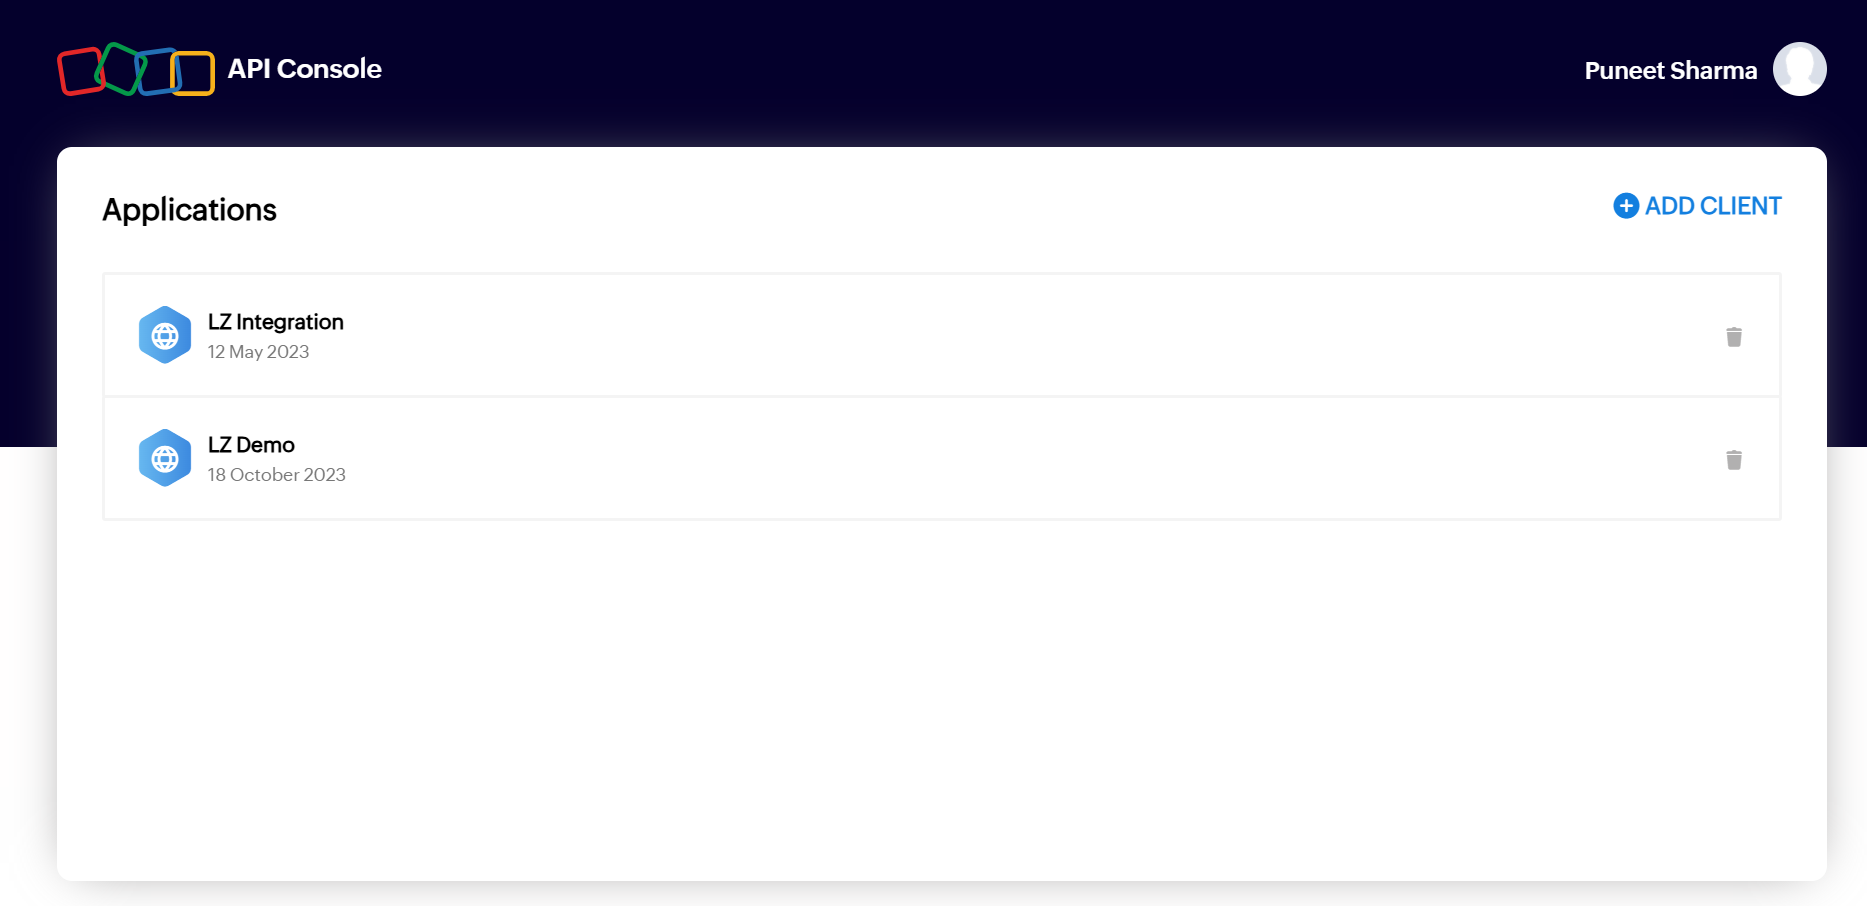
Zoho API Client Credential Setup
- Visit the Zoho developer console platform-
https://accounts.zoho.com/developerconsole
- Login using your Zoho credentials
- Once logged in Press the button ‘+Add Client’ on the top right corner,
as shown in the image below
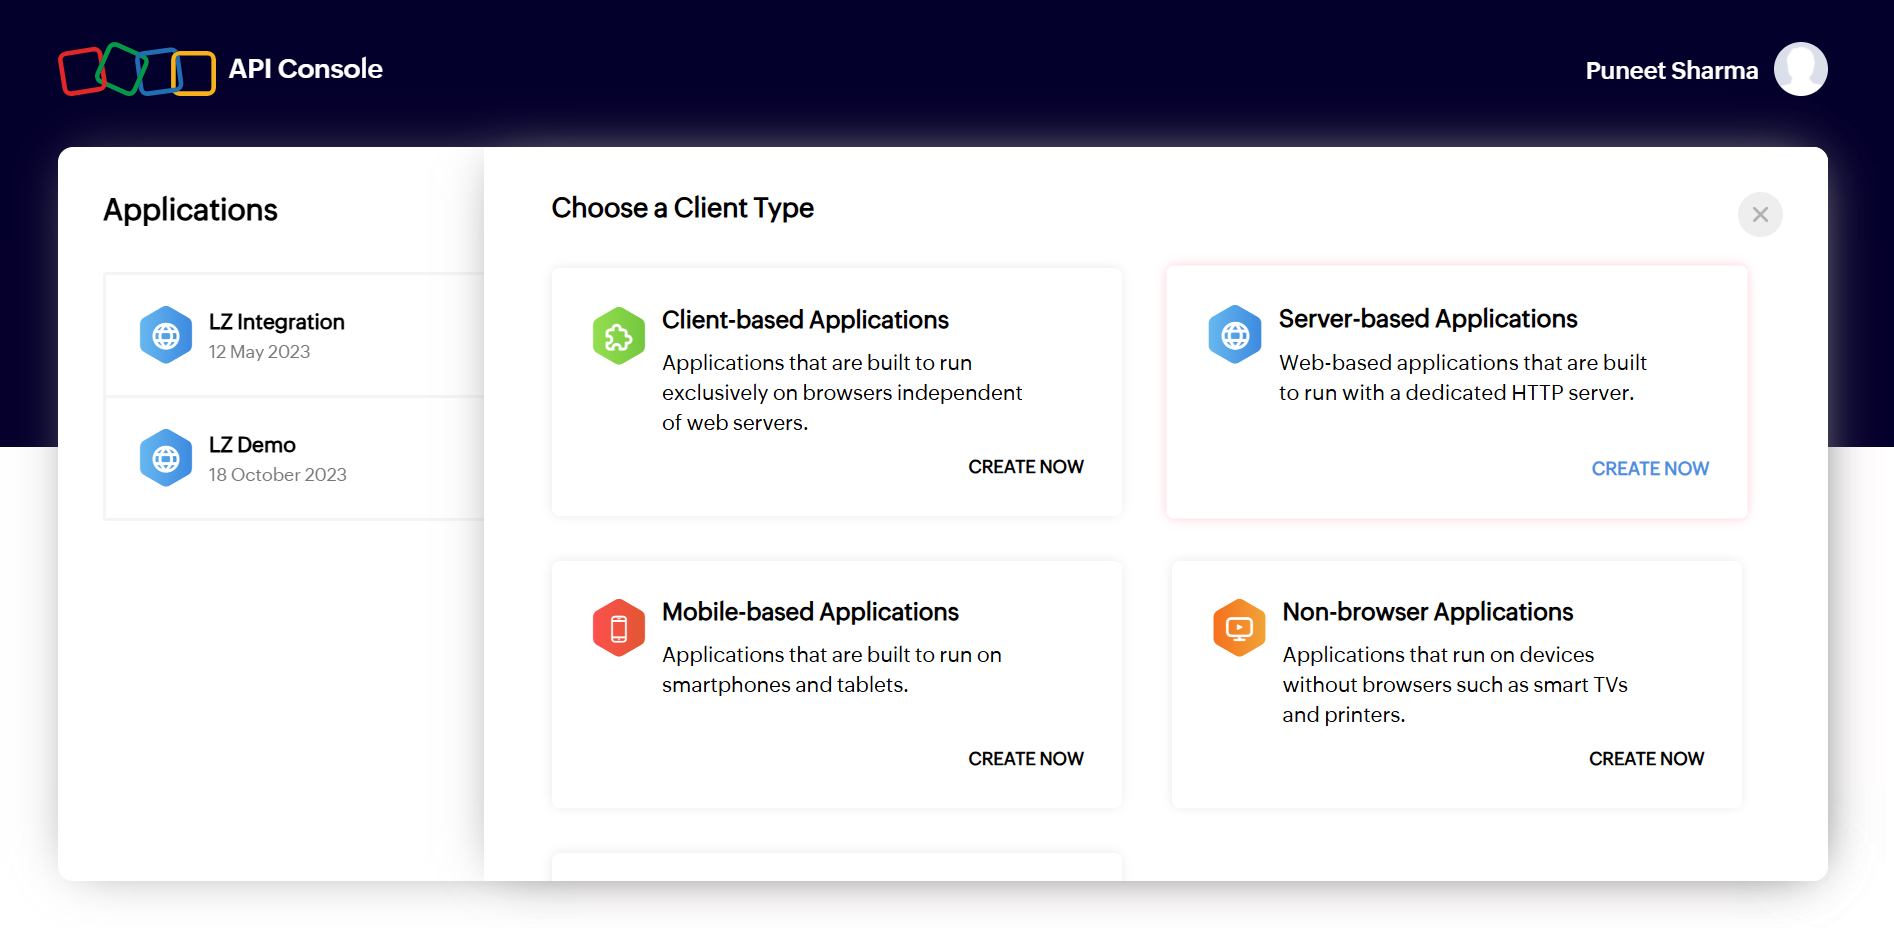
- Choose client type as ‘Server based applications’, as shown in the image below
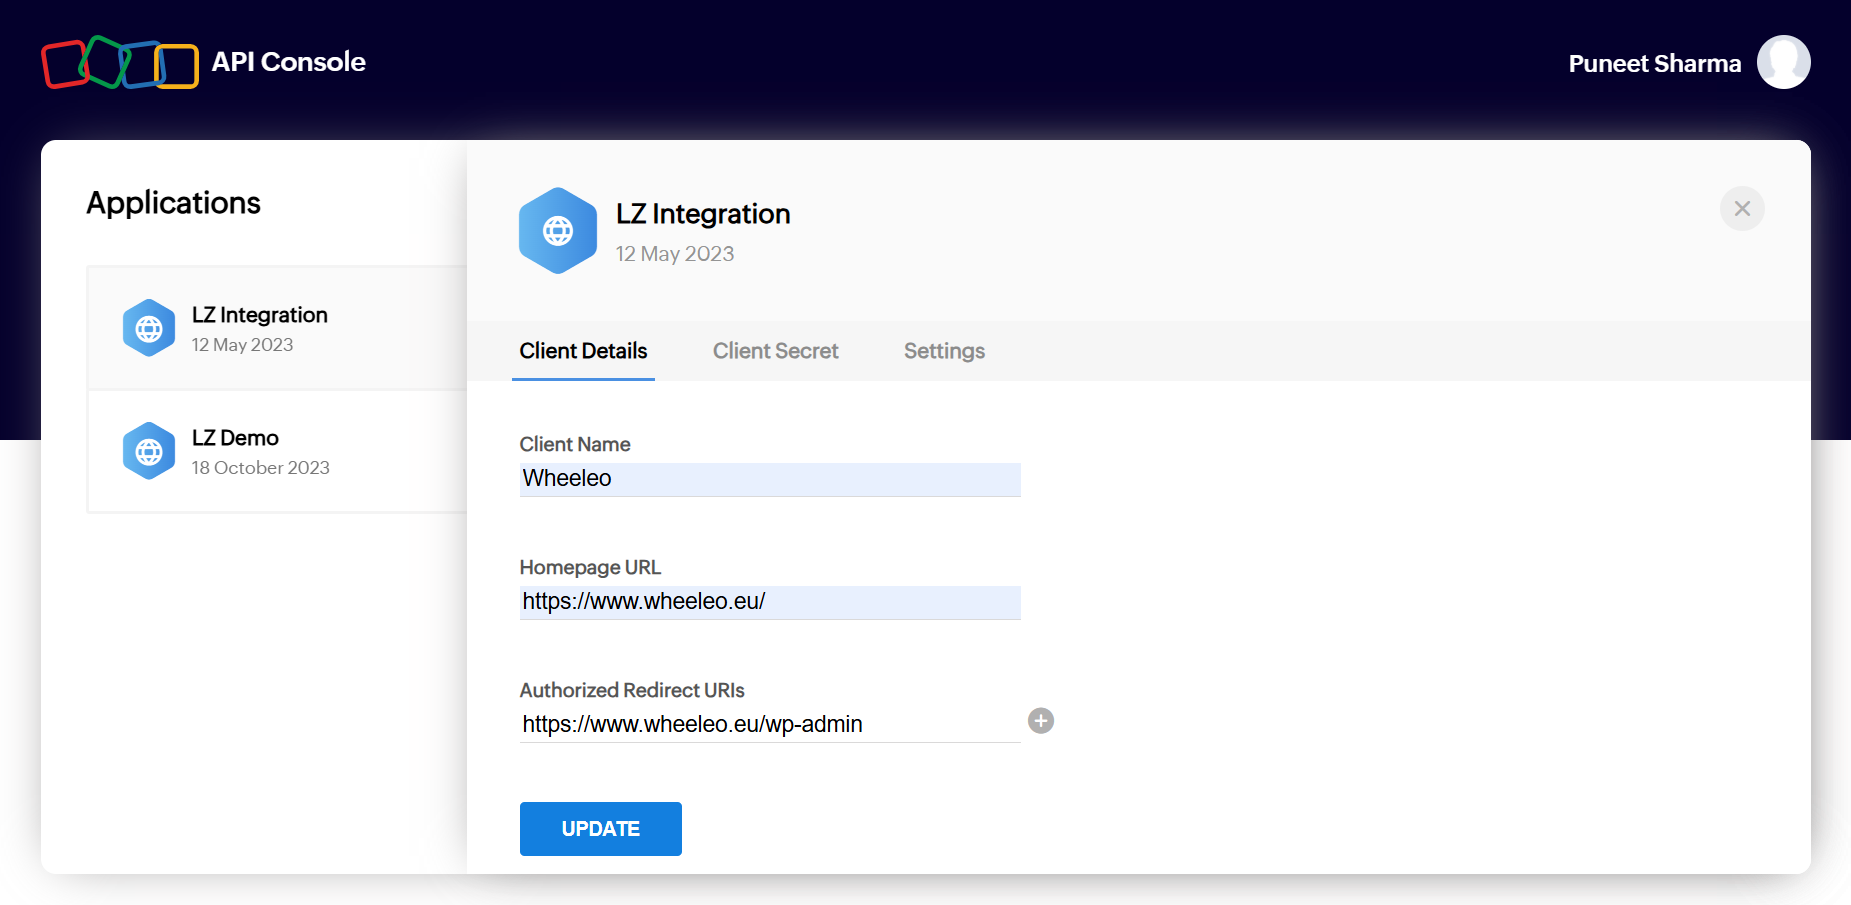
- Enter New client details as follows, refer the image below
- Client name of your choice
- Client type- server based
- Your store homepage url in Homepage URL
- In authorized redirect uris, enter the homepage url followed by ‘/wp-admin’ refer the image below
- Press create to create a Zoho API client
- Access client Id and client secret , refer the image below
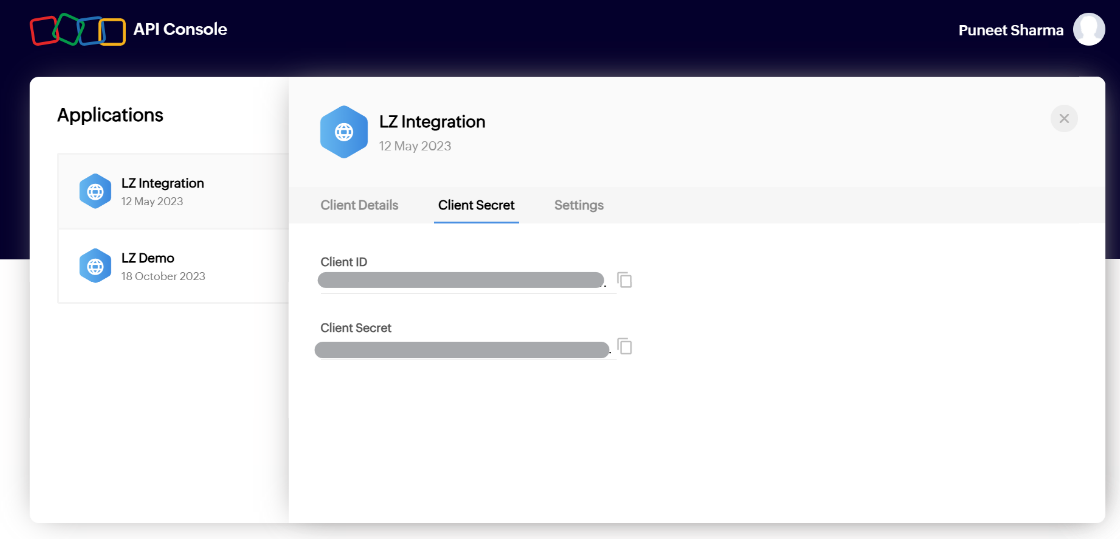
- You have successfully created a new Zoho API client, don't change anything under settings